Simple Steps to Making Your Impressions
Step 1: Brush your teeth and make sure that the tray fits your mouth covering all of your teeth including the back molars, before moving on to any of the steps! Pour the powder (alginate) from one of the bags into the plastic mixing bowl. Extra bags have been provided incase the impression needs to be taken a second time. Next, add 2 tablespoons of COLD water to the alginate and use your plastic spatula to quickly mix and make sure you work quickly! (You will notice that the alginate will turn purple after the cold water has been added, you will have 45 seconds to mix before the alginate begins to turn pink.)
Step 2: Scoop the alginate from the bowl into the impression tray, and when packing the alginate put the bulk of the material towards the front of the tray. It needs to be loaded in the tray and in your mouth before the alginate begins to turn white. Work Quickly!
Step 3: Place the loaded tray in your mouth, centering your teeth over the tray. Hold the tray still and press upward until you feel the material flow over your teeth and gums. Try not to let your teeth hit the bottom of the tray and Do not bite down-just hold the tray in place with your fingers. The impression material will come out through the holes on the tray. The alginate will turn white, which indicates the length of time for insertion in the mouth. It is imperative to keep the impression in place for a minute and a half, if you take the tray out before a minute and a half, the impression will not have the time needed to set, so it must remain in your mouth for the entire time. Once the time is up and the alginate is white in color, it is time to remove the blue tray. To remove the tray tilt upwards first then downwards and continue the upward and downward motion until the tray is released from your mouth.
Step 4: For a lower impression repeat steps 1-3
DO NOT remove the molds from the trays.
Step 5: Check to make sure that you can see the impression of ALL your teeth including the back molars. Please be sure to build up with alginate the area around the teeth, and not to be too concerned with building up the tray of the arch. In case of error, you may use the tray again, just peel old the impression if it doesn't look like the example of the picture on the blog. An extra package of impression material is included in the second clear zip lock bag. If you're not sure that you have a good impression and want to take a picture and then email it to me to verify at jenningsexpress@yahoo.com It's important that if you need to re-take the impression to wait and show me first. Otherwise if the impression doesn't turn out I can send you more alginate, but you will need to pay for the shipping. To avoid this please communicate clearly any concerns or questions that you may have before proceeding to re-take any impression.
Step 6: Seal the tray, with the impression intact, in a zip-lock bag. Do not put anything else in the zip-lock. Place the impression(s), spatula and plastic bowl in the USPS Express Mail Overnight Delivery packing enevelope that's pre-paid, & pre-addressed and return to Jennings Express LLC. We will make your customized bleach tray, night guard or sports mouth guard in our lab and send them back to you in 7 to 10 business days or less.
image of an impression

About Me

- April Minkel Jennings
- SLC, UT
- My passion has been hosting car shows the last 3 years in Houston (www.citizens4humanity.com) . We help different local charities by raising money from the car show registerations etc and by promoting volunteerism. My hope is to start doing this in UT as well and having car shows more than once a year. I would like to do other events as well. I enjoy helping people and have a team that also volunteers their time to help make a difference even if it's just by small measures. I got my start when I was going to school at HCC, I reported on a story for a car show. I really got to know the people and their passion/stories for their cars. It's amazing what you learn just by asking! I love being able to in some small way bring about change. That's a little bio about me!
Anthony & I

HCC Shot
A & A Car Show
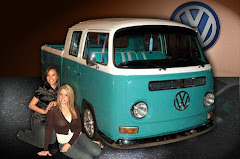
April & Anthony
